Simplify Code With Arduino Functions
June 10, 2021
Blog
Arduino boards, and the Arduino IDE is wonderful for creating small snippets of code that can activate an LED, read a sensor, activate a servo, or any number of unique physical computing applications. Such actions generally start out simple–e.g. blinking an LED on a timer–but can eventually become quite complicated as programs expand and the programmer’s skills increase.
One excellent technique for organizing expanding code is the use of functions, snippets of code that can be called as needed from other parts of the program, such as via the main loop. This technique may be old hat for experienced programmers, but for those that make their way to Arduino from other disciplines, embracing the function paradigm early and often will serve you well.
Declare a Function
In its most basic form, extra functions will look almost exactly like the setup and loop functions that you see declared on line 1 and 6 when you start a new sketch (Figure 1). These functions need to be declared outside of another function, and have a unique name. In fact, a simple copy/past/modify of the main loop function can be used to create a new function in your code.

Figure 1. New function copypasta.
Call Function, Move On
Of course, declaring a function that is never called and don’t do anything is simply a waste of space, so let’s get it to do something interesting (Figure 2). The example below basically reformats the Arduino Blink sketch to put the blinking in a function, and adds in a serial output to let you know that it “blinked on and off with delay.”
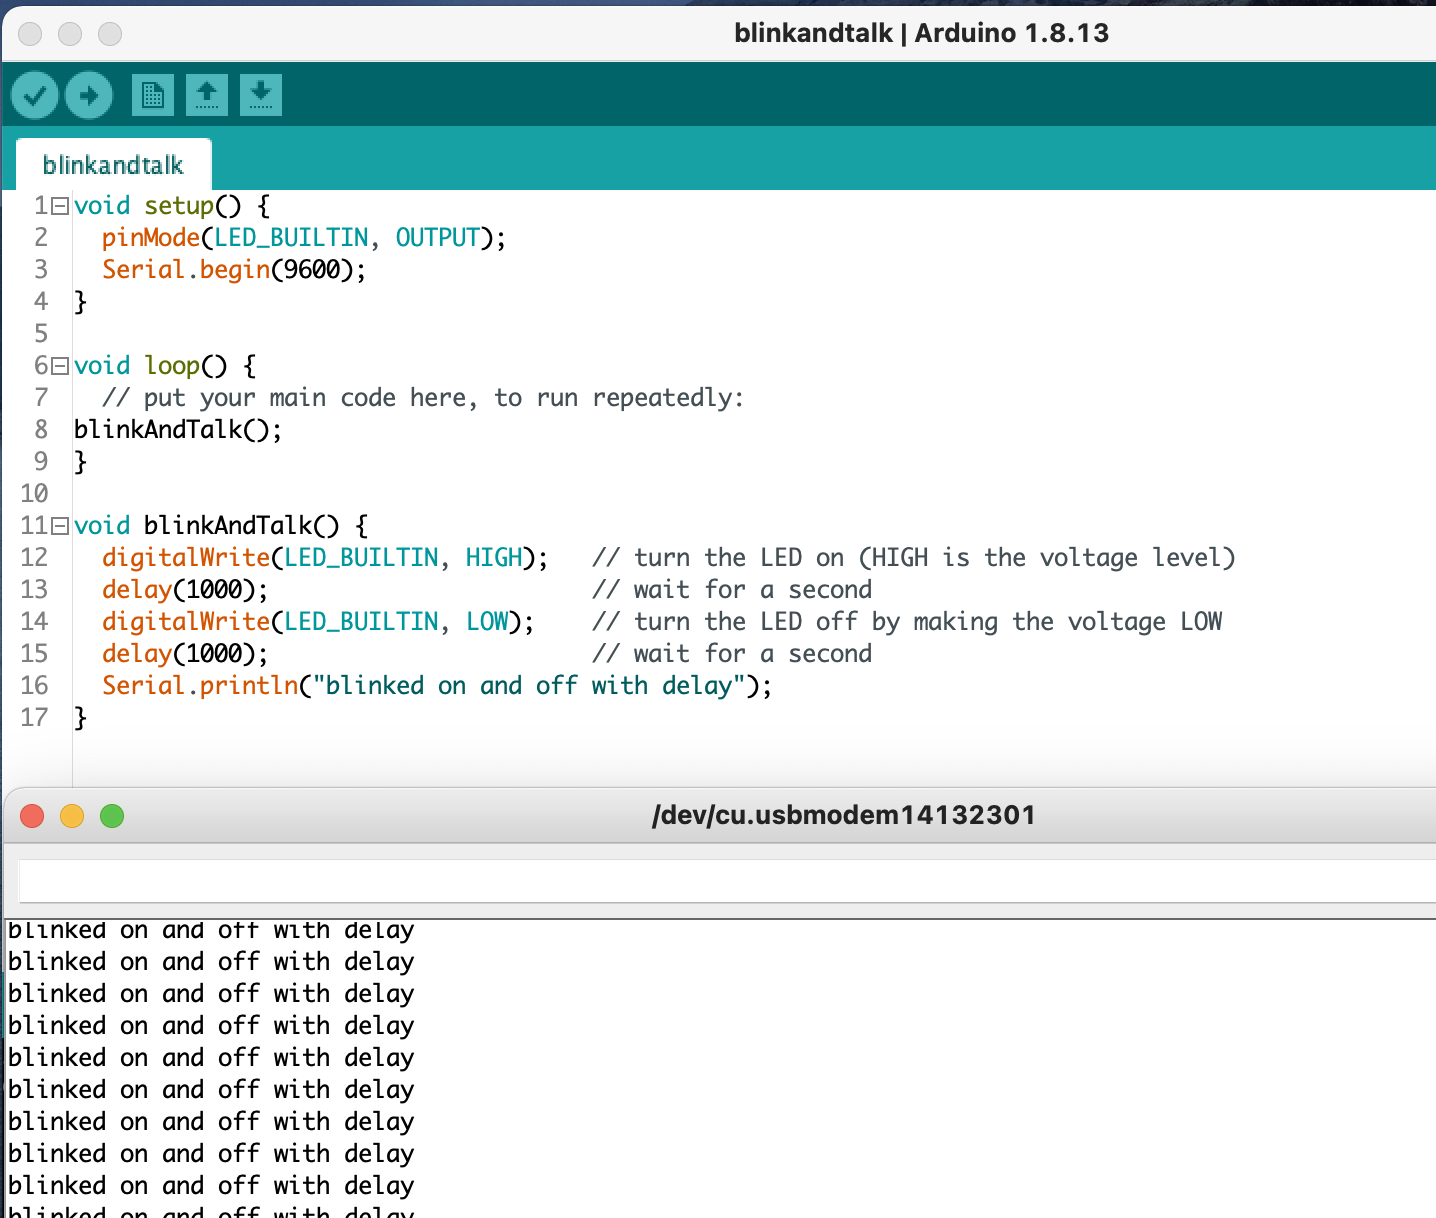
While this doesn’t do anything to simplify code here, consider how it would streamline things if you wanted to do the same sort of blink/response action at several points in your main loop. Rather than writing 5 lines of code, you would simply have to call the new function with blinkAndTalk();.
It doesn’t take many uses to see how this simplification adds up, especially if the function was more complicated. This segmenting of code also facilitates reuse of code in other programs, since you can copy/paste there as needed. In the Arduino IDE, putting functions at the end is fine, though the order may be important if you’re using a different environment, such as PlatformIO.
Functions Return Values
Besides simplifying code into easily-reused blocks, functions can also return a value. Arduino.cc provides an example of how to do this, calling the myMultiplyFunction as k = myMultiplyFunction(i, j);. Here the brackets aren’t left empty, but instead pass variables into the function itself, and k is set by the return result; line in the function (Figure 3).

Figure 3. Code from Arduino example.
Another way to pass values around would be to set a global variable in the function, which can be used in the main loop or wherever you need the result. For a number of reasons, including producing more complicated code, and making these functions more difficult reuse, using return is the better option here. If you’re curious, an example of how this could be done is show below:

Figure 4. Possible, but normally not recommended.
Once you’re ready to move past a few lines of code into more programatically interesting applications, just remember that functions are your friends. They take a little thought to set up initially, but can pay massive dividends as things get more complicated.
I recently wrote a piece of code, a small portion of which is shown below, that is close to 300 lines long. The main loop, however, has only 4 lines within the brackets, mostly to call a number of separate functions. To be honest, I should have broken it down even further into function blocks, potentially reducing the size of the program and saving myself a few headaches. Planning goes a long way here.

Figure 5. For lines of code in the main loop (comments omitted)
Jeremy Cook is a freelance tech journalist and engineering consultant with over 10 years of factory automation experience. An avid maker and experimenter, you can follow him on Twitter, or see his electromechanical exploits on the Jeremy Cook YouTube Channel!