Raspberry Pi Home Automation Part 4: Automation and Customized User Interface
November 17, 2020
Blog

In this post, I’ll go over a few tricks for setting up your user interface, as well as how you can automate things to potentially take yourself out of the loop completely!
In part 1 of this epic series, I gave an overview of my Pi home automation setup, followed by how to flash individual devices with Tasmota and in a third post I talk about how to set up Home Assistant (HA) itself. As neat as that is to turn a switch on/off from the other side of the room, we are still just scratching the surface possibilities-wise. In this post, I’ll go over a few tricks for setting up your user interface, as well as how you can automate things to potentially take yourself out of the loop completely!
Customized User Interface

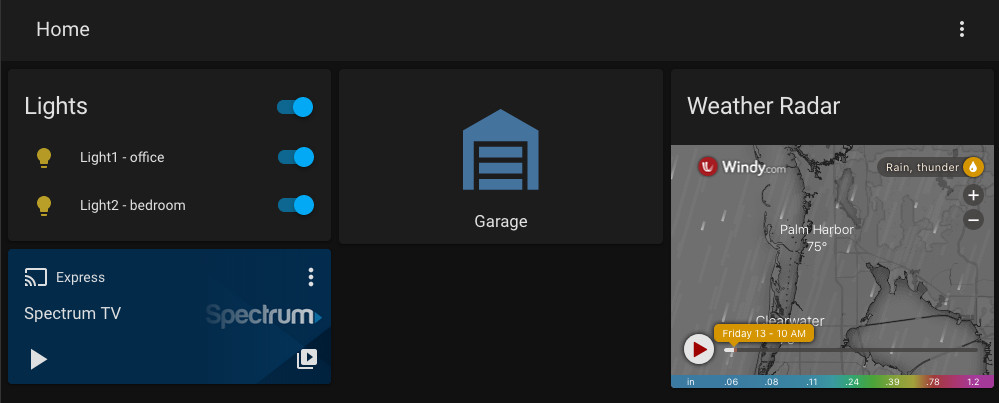
Custom UI on phone, scrolled down
Assuming you’ve got a few devices set up, click on the Overview tab to see the default interface. You can edit this by clicking in the three-dot symbol in the upper-right hand corner of the screen, which gives you a warning about things no longer being auto-updated if you take control. This is probably fine, but if you want something to fall back to, you can create a new dashboard via Configuration > Lovelace Dashboards.
I won’t go through every step here, but you can do such graphical tasks as using the arrow keys to arrange cards on the screen. Experiment with the pencil icons, + for adding another view. Also click on the dots to the lower-right and edit to the lower-left on each card to modify their properties.
UI on computer
One neat trick is that you can embed web pages right in your user interface. Click the + icon on the lower-right hand corner of the screen, then search for, or scroll down to Webpage. This could be anything, but as shown in this misperry video (with what appears to be a slightly older version of HA than I’m running), one option would be to use it with a weather website as seen in the first image.
Automations
While everything discussed so far is very futuristic, in many instances you might wonder why opening up a smartphone is easier than flipping a light switch. You’d certainly have a point, but a big part of the magic of HA is not having to do either! HA can automate actions based on time, the sun’s position, and much more!
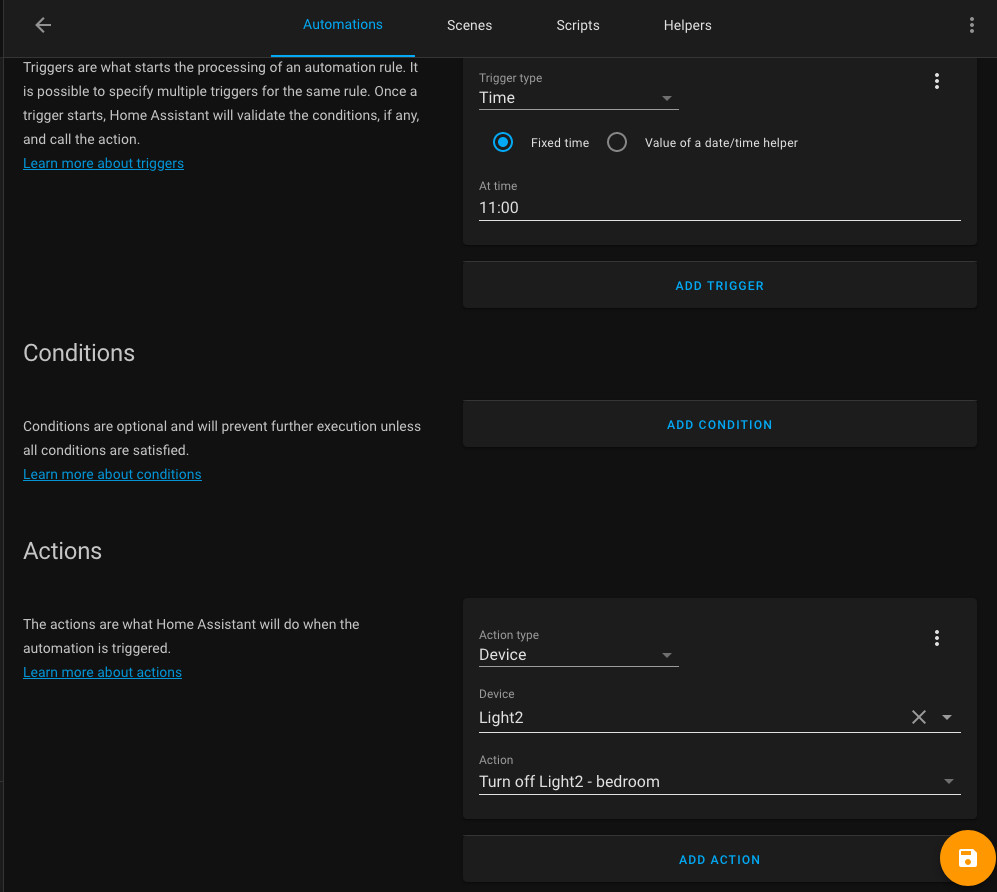
To start experimenting, go to Configuration > Automations and press the plus icon in the lower-right corner of the screen to add something. It gives you a list of what you can do, or you can click on SKIP to handle things yourself. After skipping, you can name your automation, and set Triggers (what starts it), Conditions (what optionally keeps it from running), and Actions (what it actually does).
To try things out, select Time for the trigger type and enter a time in (24) HH:MM format that’s upcoming, then select the device to trigger, and the trigger format. Save it with the little orange disk icon in the lower-right corner, and it should start at the time you specified...
After hitting the back arrow icon in the upper left to get back to the Automations screen, you can test your new automation out at any time by hitting EXECUTE. If it works this way, but doesn’t trigger on time, be sure you have your time zone set correctly in Configuration > General. Hat tip to Brian Moses for saving me quite a bit of frustration there.
Scene!

While it’s possible to control more than one device with an automation, you can also set multiple devices up in Configuration > Scenes. This allows you to select one or many entities–lights for example–set them how you like, then save it as an overall configuration that you can come back to with the touch of a button. Scenes can also be triggered in automations.
Just Scratching the Surface
What I’ve presented over these four HA posts is powerful, and useful, but there’s so much more to explore. HA can also be configured via YAML if you prefer a text-based interface, or need to adjust something in a way that’s not available graphically. Various add-ons are also available via Supervisor > Add-on Store, and between this and new hardware that you’ll likely want to integrate, it’s enough to keep you busy for some time to come.
You might start out wanting to do one simple task, but don’t be surprised if your new HA hobby starts to take on a life of its own!
Jeremy S. Cook is a freelance tech journalist and engineering consultant with over 10 years of factory automation experience. An avid maker and experimenter, you can follow him on Twitter, or see his electromechanical exploits on the Jeremy S. Cook YouTube Channel