Make a WeMos ESP8266 dev board blink via Wi-Fi
June 29, 2017
Blog
[WeMos D1 Mini back by Tpkull via Wikimedia Commons, CC BY-SA 4.0.] In my last article, I went over how I was able to program the WeMos D1 Mini ESP8266 development board via the Arduino IDE....
[WeMos D1 Mini back by Tpkull via Wikimedia Commons, CC BY-SA 4.0.]
In my last article, I went over how I was able to program the WeMos D1 Mini ESP8266 development board via the Arduino IDE. Though there a few hoops to jump through — including making sure your cable works — once it is set up, it’s pretty easy to get it to do Arduino-ish tasks, like blink its built-in LED or reply back to your computer via serial output.
On the other hand, you could simply do these functions with an actual Arduino. Though the ESP8266 has impressive specs, such as an 80 MHz clock speed, the real killer app of these modules is their inherent Wi-Fi capabilities. Getting something like this to work over your network may seem intimidating, but as I found out after some experimentation, it’s actually quite simple.
[youtube=https://www.youtube.com/watch?v=i6sZ_leNkJo]
As with my first post, I turned to an instructional video from YouTuber Innovative Tom. Although his video is about using a relay to control a fan or something similar, I wanted to see if I could simply blink the LED over my network. To prove things out, I made a few slight changes in his code, the new version which can be found here under the WeMosWiFi_Blink.ino file. This code now blinks an LED (which comes on when the pin is low), along with switching a nonexistent relay, allowing you to test this functionality with only the WeMos board itself.
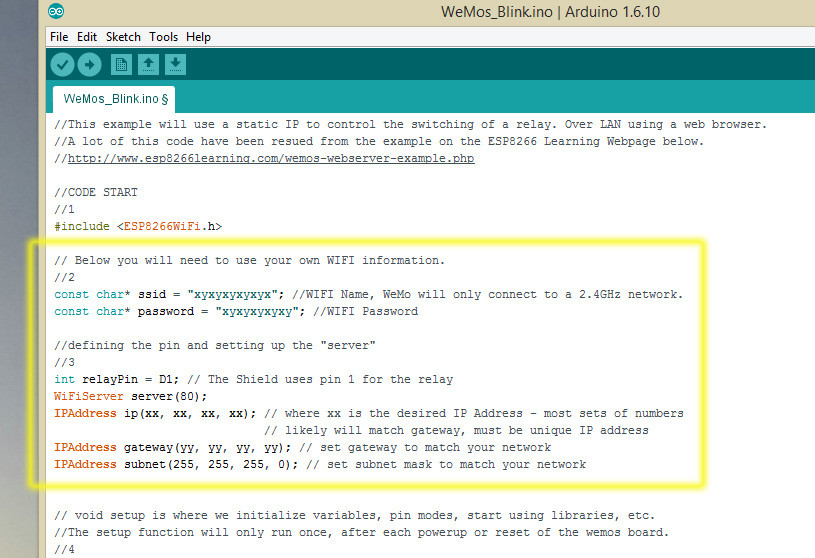
In order to do this test, open (or copy/paste) the WeMosWiFi_Blink.ino file in the Arduino IDE, then edit the area outlined in yellow to get it to communicate on your own network. You can poke around in your OS to find the configuration info, but on Windows, the easiest way to get it is to go to the command line or PowerShell and enter “ipconfig.” Your computer will obediently spit out the needed network data. You’ll also need your network name and password, which hopefully you have handy.

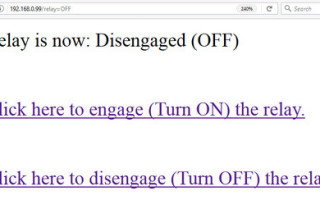
Once this is done, pull up your serial port monitor in the Arduino IDE and download the program into the WeMos module. If everything is successful, you should see an IP address pop up on the serial monitor. Copy this into your browser of choice running on the same network, and you’ll see an extremely simple webpage inviting you to turn the relay on or off. Click on one of the links it presents and you’ll see the light blink accordingly.
You can also log onto the same site from a different device, such as a smartphone, and flip the “switch.” This makes it an ideal candidate for home automation, since you don’t have to worry about any sort of extra app to build or install. There are, of course, all kinds of ways you can expand on this module’s wireless capability, such as building a better webpage, switching an actual relay, or remote sensing. Once you’re through this first step, hopefully other great projects will be just a matter of adding on to this foundation!