Fusion 360 2D DXF Export for KiCad, Lasers, and More
May 12, 2023
Blog

While Autodesk Fusion 360 is by nature a 3D design package, what if you need a 2D format file for use with tasks like laser cutting and PCB design? Generating a 2D DXF (Drawing Exchange Format) file is surprisingly easy if you know where to look.
Fusion 360 Sketch to 2D DXF

Image Credit: Screencap
To generate a proper sketch for export from a 3D surface, hit the create sketch icon in Fusion360, then select the surface that you wish to export as a DXF. Once in the sketch, click on the surface again so that the features you care about are highlighted blue, and hit Finish Sketch to generate a sketch with these features.
To turn this sketch into a DXF, right-click the sketch listing in the browser and select Save As DXF. Name the file and save it to your desktop or elsewhere. You now have a DXF ready for use in 2D-based CAD, CAM, and EDA packages, as well as other programs that can take advantage of it.
While it’s often convenient to generate a sketch as outlined above, you can also draw a new sketch or modify one that already exists as needed for export. Alternatively, if you’d like to generate a more traditional engineering drawing in DXF format, navigate to File > New Drawing > From Design. Select drawing properties and place and label drawing elements as needed, then click Export > Export Sheet as DXF.
DXF to KiCad

Image Credit: Screencap
Once you’ve generated your 2D DXF file, open the KiCad PCB Editor and navigate to File > Import > Graphics. This will open a dialog where you can select the units, scale, layer, and more. One option that is important here is the Group items checkbox, which dictates whether the imported graphic segments are modified individually, or if they’re treated as a block of graphics that move together as one unit.
DXF to Laser Cutter (LightBurn)

Caption: Set units correctly or prepare for improperly sized results
Image Credit: Screencap
While there are a number of laser cutter programs available, I use LightBurn for my projects and find it to be a fantastic interface. To import DXF graphics into LightBurn, simply drag the file into your laser cutter workspace. If you need to modify the units, select the gear icon > File Settings, and select the proper parameter under DXF Import Settings. LightBurn can “Auto-detect units if possible,” though I usually set things manually.
DXF to Other Drawing Programs
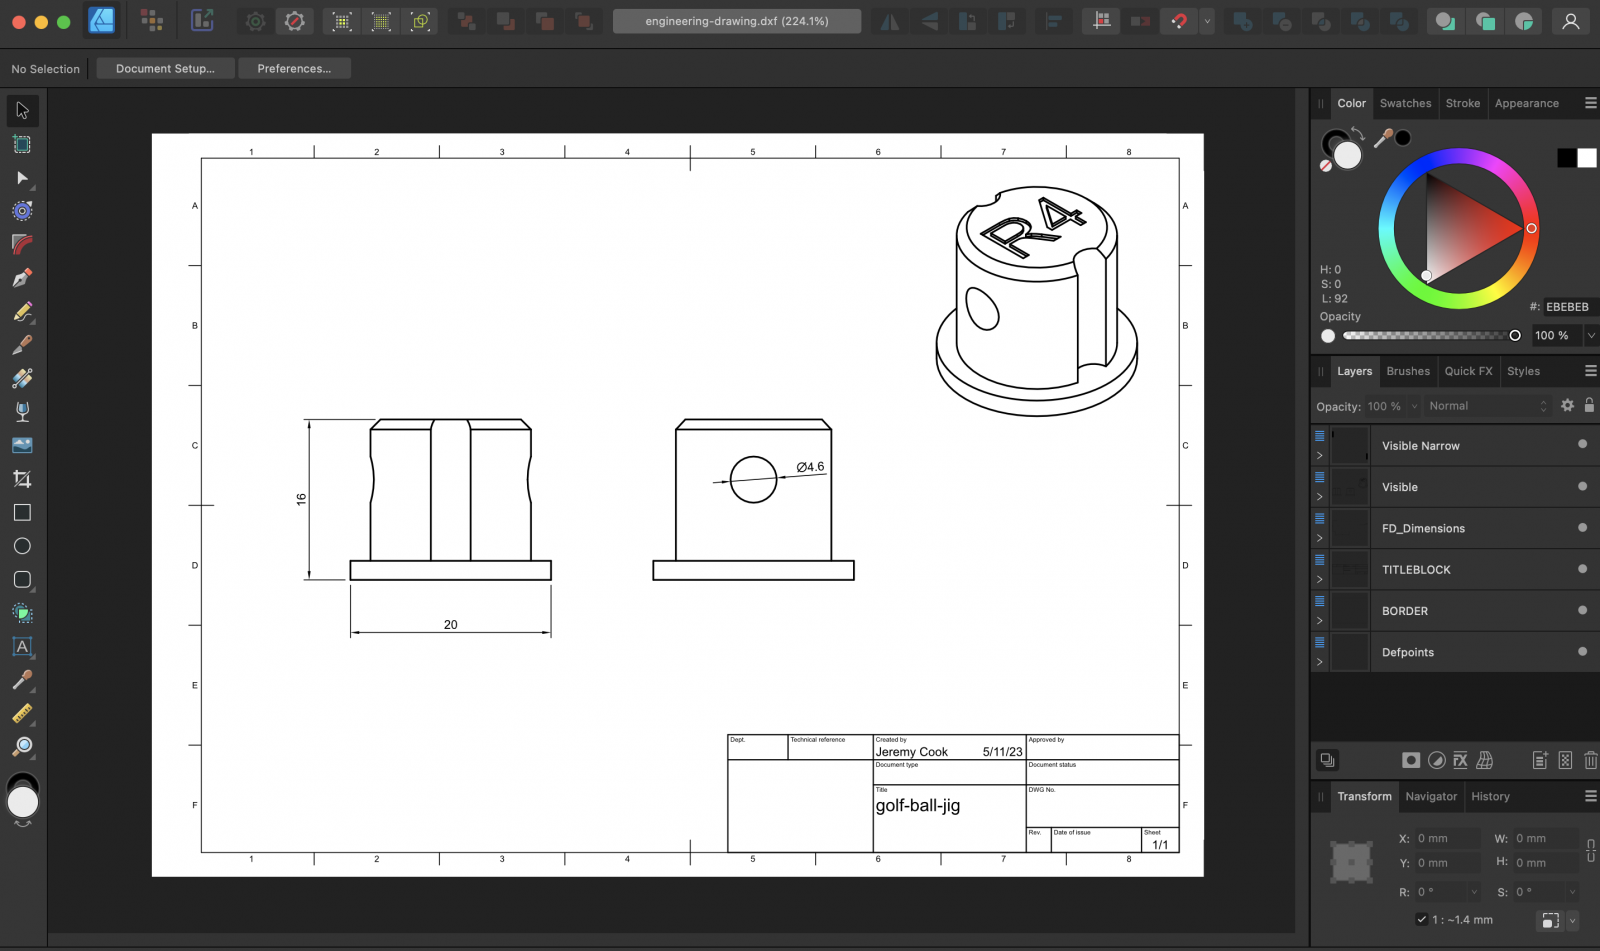
Caption: Exported drawing opened with Affinity Designer
Image Credit: Screencap
DXF format drawings can be imported to AutoCAD and similar 2D design programs, as well as more artistic-focused vector packages like Inkscape, Affinity Designer, and Adobe Illustrator. While you may or may not be the one ultimately designing art or documentation from your 3D designs, being able to supply such a file can be instrumental to getting the results you want.
Fusion 360 2D DXF Export Opens Up Possibilities
While 3D CAD has revolutionized the way we’re able to design things for our three-dimensional world, there are still a wide range of reasons why you might need to use a 2D format. Fortunately, generating the proper files is very easy with Autodesk Fusion 360 as long as you know where to look. This design ability has been essential for me completing a wide range of projects, including this Raspberry Pi 4 Enclosure made from circuit boards, and a PCB coin cell holder light.