Using FreeRTOS with the Raspberry Pi Pico and AWS IoT ExpressLink: Part 6
May 03, 2023
Blog

We will pick up where we left off in Part 5 to extend the cloud connected capability of our embedded application using FreeRTOS with the Raspberry Pi Pico and AWS IoT ExpressLink.
As a continuation of the series where we have been exploring writing embedded applications for the Raspberry Pi Pico using FreeRTOS, this blog will demonstrate how to subscribe to an MQTT topic with AWS IoT ExpressLink. We will then parse incoming messages from the UART using the FreeRTOS coreJSON library to toggle the on-board LED.
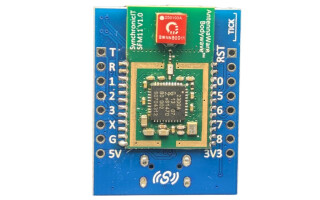
To review, AWS IoT ExpressLink is both a connectivity module as well as a software specification that simplifies connecting devices to AWS IoT Core. In the previous blog, we showed how to configure the module and publish messages to an MQTT topic from an embedded FreeRTOS application running on the Raspberry Pi Pico. The messages were then retrieved from the MQTT test client in the AWS IoT console. We will build off of this configuration and code to show how to receive messages within the FreeRTOS host application running on the device.
AWS IoT ExpressLink utilizes a serial connection and an AT command set as the interface for host applications. To connect the module to the cloud, you can use the command “AT+CONNECT”. To send data from the device to the cloud, you can use the command “AT+SEND1” with the topic pre-configured via "AT+CONF Topic1=pico”. Now, we will introduce two new AT commands supported by AWS IoT ExpressLink: “AT+SUBSCRIBE1” and “AT+GET1”.
With “AT+SUBSCRIBE1”, you can subscribe to an MQTT topic. This means that messages published to that topic will be sent by the MQTT broker to the client. In our case, the broker is AWS IoT Core and the client is the AWS IoT ExpressLink module. The topic you subscribe to must be configured in the same way “AT+SEND1” was configured.
For the example in this blog, we will use the MQTT topic “/led”. This will be configured with "AT+CONF Topic1=/led”. Once subscribed to this topic, messages can be retrieved from the module using the command “AT+GET1”. Note that additional topics can be configured and subscribed to by incrementing to Topic2, Topic3, and so on.
The example application below is a modification from the code used in the previous blog. It uses the UART on the Raspberry Pi Pico with the same functions. It also creates a FreeRTOS task that is used as the primary loop, which is now the vTaskExpressLinkLED() function. Take a moment to review the code and run it on your own Raspberry Pi Pico by following the build and flash instructions from the first blog in this series.
#include "FreeRTOS.h"
#include "core_json.h"
#include "pico/stdlib.h"
#include "semphr.h"
#include "task.h"
#include
#include
#include
#define BUFF_SIZE 4096 // 4K
#define TRIES_MS 60000 // 60 secs
#define IRQ_WAIT_US 10000 // 10 millis
static int buff_idx = 0;
static uint8_t buffer[BUFF_SIZE];
static absolute_time_t irq_timestamp;
static SemaphoreHandle_t print_mutex;
static SemaphoreHandle_t expresslink_mutex;
void on_uart_rx() {
irq_timestamp = get_absolute_time();
while (uart_is_readable(uart1)) {
int c = uart_getc(uart1);
if (buff_idx < BUFF_SIZE) {
buffer[buff_idx++] = c;
} // drain the UART if buffer is full
}
}
void setup_uart() {
uart_init(uart1, 115200);
gpio_set_function(4, GPIO_FUNC_UART); // 4 is TX
gpio_set_function(5, GPIO_FUNC_UART); // 5 is RX
uart_set_hw_flow(uart1, false, false);
uart_set_format(uart1, 8, 1, UART_PARITY_NONE);
uart_set_fifo_enabled(uart1, false);
irq_set_exclusive_handler(UART1_IRQ, on_uart_rx);
irq_set_enabled(UART1_IRQ, true);
uart_set_irq_enables(uart1, true, false);
}
void vResetBuffer() {
memset(buffer, '\0', BUFF_SIZE);
buff_idx = 0;
}
void vTransmit(char *send, char *response) {
xSemaphoreTake(expresslink_mutex, portMAX_DELAY);
vResetBuffer();
uart_puts(uart1, send);
int tries = TRIES_MS;
while (strlen(buffer) == 0 && tries > 0) {
busy_wait_ms(1); // wait for first byte in buffer
--tries;
}
while (absolute_time_diff_us(irq_timestamp, get_absolute_time()) < IRQ_WAIT_US) {
busy_wait_ms(1); // wait for timeout from last UART interrupt
}
strncpy(response, (char *)buffer, BUFF_SIZE);
xSemaphoreGive(expresslink_mutex);
}
void vSafePrint(char *out) {
xSemaphoreTake(print_mutex, portMAX_DELAY);
puts(out);
xSemaphoreGive(print_mutex);
}
void vPrintAndTransmit(char *send) {
char *response = malloc(BUFF_SIZE);
vSafePrint(send);
vTransmit(send, response);
vSafePrint(response);
free(response);
}
void vProcessMessage(char *response) {
char *trimmed = strchr(response, '{');
if (trimmed != NULL) {
char *value;
size_t valueLength;
JSONStatus_t result = JSON_Search(trimmed, BUFF_SIZE, "led", 3, &value, &valueLength);
if (result == JSONSuccess) {
if (strstr(value, "on")) {
gpio_put(PICO_DEFAULT_LED_PIN, 1);
}
if (strstr(value, "off")) {
gpio_put(PICO_DEFAULT_LED_PIN, 0);
}
}
}
}
void vTaskExpressLinkLED() {
vPrintAndTransmit("AT+CONNECT\n");
vPrintAndTransmit("AT+CONF Topic1=/led\n");
vPrintAndTransmit("AT+SUBSCRIBE1\n");
for (;;) {
char *response = malloc(BUFF_SIZE);
vSafePrint("AT+GET1\n");
vTransmit("AT+GET1\n", response);
vSafePrint(response);
vProcessMessage(response);
vTaskDelay(10000);
free(response);
}
}
void main() {
stdio_init_all();
busy_wait_ms(5000);
setup_uart();
gpio_init(PICO_DEFAULT_LED_PIN);
gpio_set_dir(PICO_DEFAULT_LED_PIN, GPIO_OUT);
print_mutex = xSemaphoreCreateMutex();
expresslink_mutex = xSemaphoreCreateMutex();
xTaskCreate(vTaskExpressLinkLED, "ExpressLink LED Task", 256, NULL, 1, NULL);
vTaskStartScheduler();
}
The vTaskExpressLinkLED task first connects to AWS, configures the MQTT topic, and then subscribes to the topic, all done by issuing AT commands to AWS IoT ExpressLink. Then, the task sits in a loop and checks for incoming messages every 10 seconds. Messages are processed using the vProcessMessage() function, which also utilizes the FreeRTOS coreJSON library.
The FreeRTOS coreJSON library is a standalone open source library that has no specific dependencies beyond the standard C libraries, and can be used to parse and search JSON strings. JSON is often used as the payload format for MQTT messages, so this library is very helpful for us here. In our example, we will use JSON in our message payload to instruct the application to toggle the LED on and off. The function “JSON_Search” from the coreJSON library is what we use to find the value of the “led” attribute in the message payload.
Once the application is running on the Raspberry Pi Pico, the output from the terminal application should look like this:
AT+CONNECT
OK 1 CONNECTED
AT+CONF Topic1=/led
OK
AT+SUBSCRIBE1
OK
AT+GET1
OK
Next, log in to the AWS IoT Console to send a message. In the navigation pane, choose Test and then MQTT Test Client. In the Publish to a topic tab, enter the values shown in the screenshot below and then choose Publish.

Within the 10-second delay from vTaskDelay(), the LED on your Raspberry Pi Pico should turn on. Entering { “led” : “off” } in the message payload and publishing that message will then turn the LED off. The output in your terminal application will reflect this as well:
AT+GET1
OK { "led" : "on" }
AT+GET1
OK { "led" : "off" }
As you can see, sending messages from the cloud to your embedded application is easy using AWS IoT ExpressLink. Of course, messages can be sent programmatically from cloud-based applications as well. Using this as a jumping off point, you can use the same functionality in your embedded applications, performing other actions based on the message content. AWS IoT Core is highly scalable, so the same fundamental building blocks apply to fleets of devices.
We hope the demonstration of using FreeRTOS with the Raspberry Pi Pico and AWS IoT ExpressLink, along with the help of the FreeRTOS coreJSON library, was informative and useful for building IoT applications. Please reach out with any questions or comments. Happy building!


