Create Custom UF2 File for Easy CircuitPython Flashing
June 23, 2023
Blog
CircuitPython is a programming language used on a wide variety of dev boards and microcontrollers. This includes the Raspberry Pi Pico, which I use extensively for demos in the Developing with Pi webinar series. While the RP2040-based Pico can be used with Arduino C and the Arduino IDE, what is interesting about CircuitPython in this context isn’t the language itself so much as the programming process.
Arduino C is a compiled language, meaning that the compiler on your computer takes your instructions and turns them into a format that the microcontroller/dev board can use. CircuitPython is an interpreted language, meaning the processor running things takes your written code and translates it line-by-line into usable information with no upfront compiling process. Partially as a consequence of this paradigm, you can open code on a CircuitPython board with a run-of-the-mill text editor, save it, and it will simply start running the new code.
An important caveat of doing things this way is that a CircuitPython board must first be set up to run such code by copying the appropriate UF2 file onto it. This UF2 file (i.e. USB Flashing Format) will typically configure IO pins for a given dev board, so a UF2 created for one device likely won’t work for another (e.g a Raspberry Pi Pico UF2, most likely won’t work with an Adafruit KB2040 Kee Boar). If you need to access external libraries and/or supporting files, such as images or sounds, they must be loaded separately.
This works quite well for prototyping, but quickly becomes cumbersome if you need to make multiples of widget X. Fortunately, you can make a custom UF2 file for your board, and its current configuration can be copy/pasted into your dev board in one step. Compiled would be the wrong term here, though perhaps “bundled” would be appropriate.
Custom UF2 Setup
To make a custom UF2, install the software tool picotool. The setup process will vary depending on your computer, and what’s outlined below is based on a macOs installation. I used previously-installed package manager Homebrew to add picotool to my computer by following these instructions, which worked flawlessly.
Set up your dev board exactly as you would like it to be duplicated, including any libraries and/or additional files. Restart your RP2040 in BOOTSEL mode; for the Pico, hold down its button while plugging it in. Enter the following on your command line:
picotool save --all full_duplicated_board.uf2
This will save your board as a UF2 file in your home directory as “full_duplicated_board.uf2.” This can then be copied onto a new device plugged into your computer. Copy, paste, and wait for the process to complete. Your new board will have all the software properties of the original.
Verification Going Further
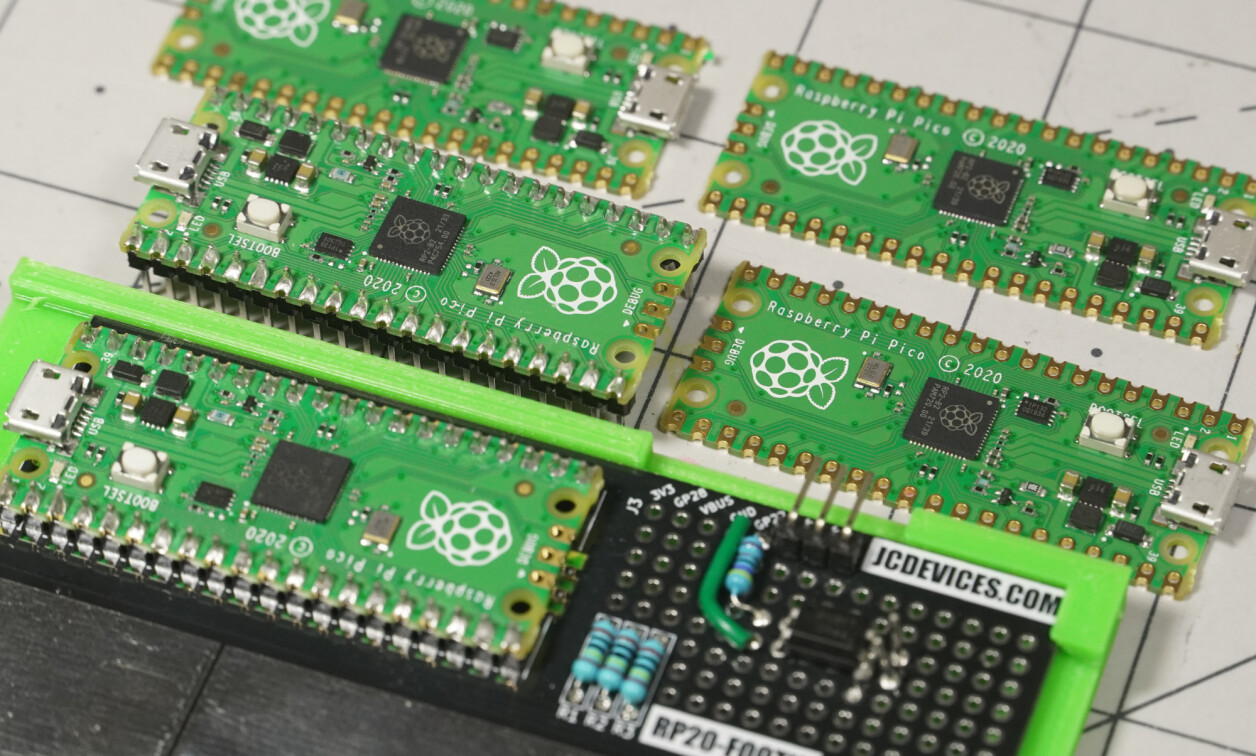
.png)
Caption: Blink code found on Adafruit
Image Credit: Jeremy Cook
If you are making 100 of widget x, you’ll want some automatic assurance that the copy/paste process has worked correctly. You could pop around in the file system to verify, but a better method may be to have it blink once or more to let you know that it’s been programmed.
To speed things up further, it’s likely possible to flash CircuitPython on a Pico or other RP2040-based board using the SWD pins. However, this Xenon board setup is the only example of CircuitPython SWD-flashing that I’ve seen. Along with showing the process, it also illustrated that CircuitPython and UF2 files aren’t just for the RP2040; the Xenon used the Nordic nRF52840 SOC for processing.
Once the UF2 is flashed, a text editor will nominally work to make code changes to code.py or other files. Supporting files can be dragged on as needed. On the other hand, an IDE like Mu is helpful for code debugging and provides a serial monitor, so you may prefer to use it or other tools. However, if your target end-user is comfortable copying files and/or opening a text editor but would rather not install a new IDE to make a simple change or two, CircuitPython can be a good solution for this scenario.
Custom UF2 flashing dramatically speeds up RP2040 setup time versus performing several individual copy/paste/flash steps. While you might not want to plug and flash a few thousand individual boards, if you need to make a handful of copies, a custom UF2 plug-and-drag process may be the perfect solution.