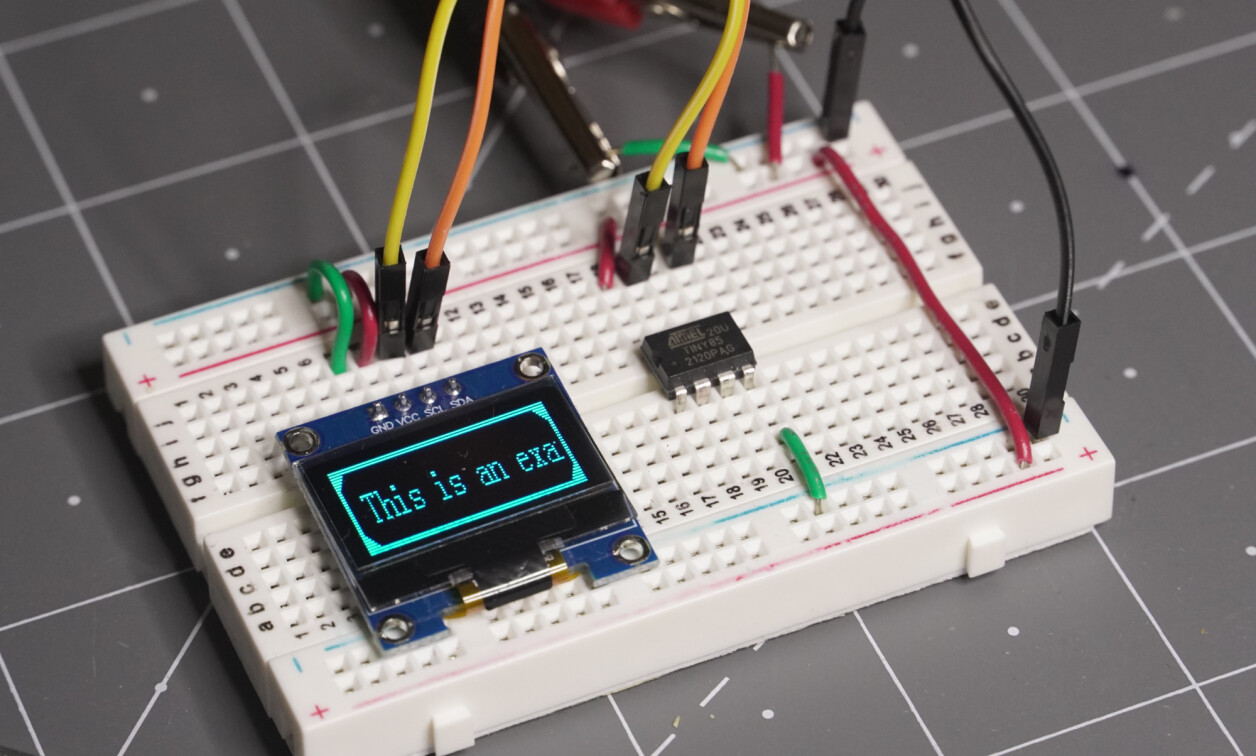
Control a .96 Inch SSD1306 OLED Screen With the ATtiny85 and I2C
November 18, 2024
Blog

The ATtiny85 (and its ‘45/’25 cousins) are fantastic little chips capable of performing a wide range of jobs while using minimal power. What could make this little chip even better? How about the ability to control a tiny I2C OLED display, i.e. the SSD1306 .96” 128x64 pixel screen that you can find on a variety of online outlets.
While traditional display libraries typically won’t work with the ATtiny85 et al’s limited resources, there are other code options that claim this capability. This article will focus on the Tiny4kOLED library, which works well for basic display tasks and graphics. Perhaps most importantly, I was able to get it working.
Library Installation and Example Install
In the Arduino IDE library manager, search for and install Tiny4kOLED, along with the TinyWireM library for I2C communication. The Tiny4kOLED library includes several examples, and you can load “ScrollingText” to follow along with this article.
(1).png)
Image Credit: Jeremy Cook
To get ScrollingText to compile, uncomment the #include
.png)
Caption: Uncomment as shown / Image Credit: Jeremy Cook
Connect power and ground to the ATtiny85 along with the OLED. Connect ATtiny pin 7 to OLED SCL and ATtiny pin 5 to OLED SDA. Apply power and ground (5V and 3V tested) and you’ll see a rather self-referential “This is an example of scrolling text.” statement passing by on the screen.
Simple Text
Looking at the built-in examples, I didn’t see anything that would display text in its most basic form. To demonstrate this functionality, I wrote two test programs that show text on-screen. basic_text.ino shows four simple messages at different on-screen coordinates, while text_row_column.ino loops through to show how text rows and columns are configured.
Note that text rows are divided up into groups of 8 pixels each, so row 0 is on the top and row 6 is on the bottom (skipping rows 1, 3, 5, and 7 in this case to provide room for the 8x16 font). Text columns start based on the pixel value, so 0 is the beginning, and 64 is halfway through a 128-pixel OLED.
While I have’t tried, it, if you get bored with the normal text displayed by this library, a separate TinyOLED-Fonts library is available to keep things interesting. With this text display capability sorted, you can use it to show all manner of information. Graphics are also possible with this library, but for what I had in mind text should be sufficient.
Addendum: Other Displays, Inspiration
(3).jpg)
Caption: Code for 96x16 screen needs to be configured / Image Credit: Jeremy Cook
The .96 inch 128x64 I2C OLED seems to be the de facto standard in this sort of inexpensive micro display, but there are others available, such as a 128x32 version, and another with a resolution of 64x32 pixels. The library’s GitHub documentation references several sizes, so there is a good chance this will suit your needs for ATtiny85 experimentation. I tried using a 96x16 pixel screen, which wasn’t covered in the examples. Subbing it in for the 128x64 screen that I was using with no further configuration, it appears to simply show part of what was displayed on the larger (less tiny) screen.
For a bit more info on the setup and programming process, this video is a good resource–especially just after the 4:00 mark–and shows how to set up an ATtiny85 temperature and humidity sensing unit. The Tinusaur project also looks interesting, and Tiny4kOLED library.
I hope that this article serves as as a good reference for those wanting a simple graphical output for their ATtiny85 projects. On the other end of the spectrum, this article explains how to use an LED display with the Arduino Opta. For even more info on what you can do with the Arduino ecosystem, be sure to check out my monthly Developing With Arduino online training series.


