Manage and Customize Your KiCad Symbol Libraries
July 30, 2021
Blog

Jeremy shows an easy and fun way to create symbols in new libraires using KiCad.
A little over a year ago, I “took the plunge” into PCB design using the open-source and free to use KiCad EDA package. My first design was a very basic battery-powered flasher using an ATtiny85 and 5 LEDs. Since then, I’ve created enough other projects using this newfound ability to partially populate a display case with them, and have even set up an assembled PCB (PCBA) design for resale.
While KiCad provides a wide array of components in their included libraries, at some point you’ll come across a part that you’d like to use which isn’t included by default. In this case, you’ll need to create or use an existing custom library to extend the package’s functionality. The good news is that, as outlined below, adding new symbols and libraries isn’t particularly difficult.
Create A New Symbol in a New Library
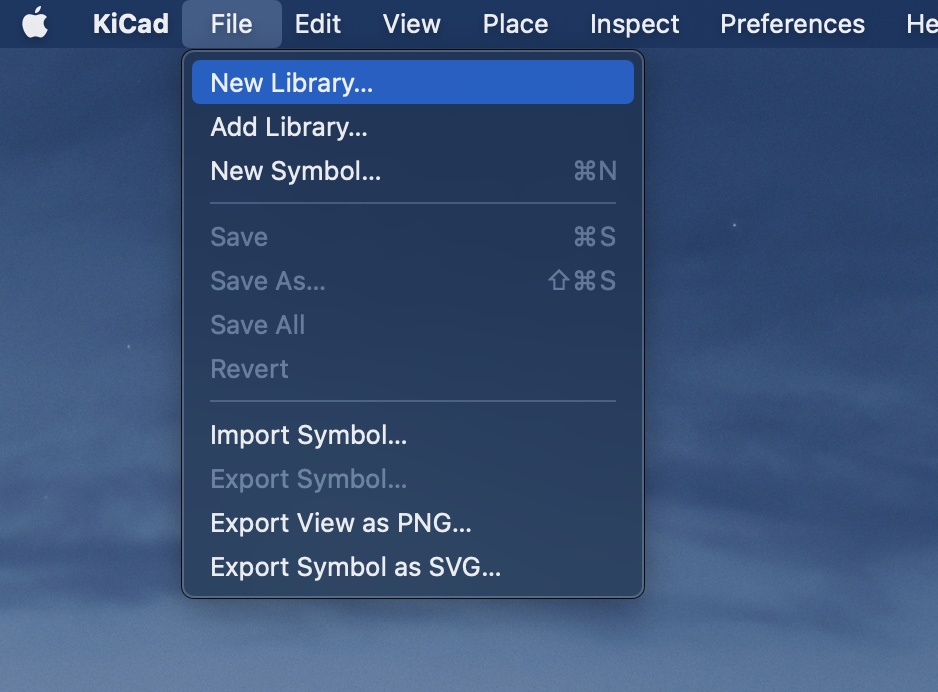
From the main KiCad project window, click on the op-amp icon to open the symbol editor, or go to Tools – Edit Schematic Symbols. Once in the Symbol Editor go to File – New Library (or you can supposedly click on a books-shaped icon, which I did not find in my 5.1.6 MacOS version). Ensure that the directory where you’d like to save it is selected, enter a name to save the library as, then click save.
Here you’ll be presented with an option as to whether you’d like to add this to the Project or Global Library table. Assuming you’d like to just use this component on a single project, select the Project option, and hit OK.
If you prefer, assigning the library as global will allow you to use the project in any other design, which may or may not be beneficial for your scenario. To use it with other projects, you’ll also need to assign the location under Preferences – Manage System libraries, touched on below, and elaborated upon much more in the KiCad library management FAQ.

Find your newly created library in the left “Libraries” column, using the filter input as needed. Right click and select New Symbol…; give it a name and hit OK. You can now define your new schematic symbol with pins, outlines, and the like, with an interface that will feel familiar if you’ve used the Schematic Layout Editor.
Once you’re satisfied with the symbol’s design, save it, and the star by the library and symbol will disappear, indicating you don’t have any unsaved info to floating about (this seems to take a few seconds and/or clicking on the item in the library column to register). Open the Schematic Layout Editor again and add your new symbol as you would with any other part.


Caption: Perhaps your custom symbol will be more interesting and/or useful
External Symbol Libraries
To work with downloaded or stored libraries, under Preferences – Manage Symbol Libraries (available in the project window, Schematic Layout Editor, and Symbol Editor), click on the Project Specific Libraries tab, or leave on Global if you prefer to edit those listings. Here you can add libraries/library paths and add or remove check marks next to the libraries that you wish to be active or inactive. This can be helpful for managing libraries that you’ve created, but even more so for custom libraries that others have made available.
KiCad’s official symbol library list is found here. This may not add anything compared to what you have but is a good place to start experimentation with “new” libraries. To give this a try, download and decompress a library file, then place the .lib (library) and .dcm (metadata) files in a convenient directory. You’ll likely then want to rename both with the same new name to avoid any confusion. You can then open symbols in this library and modify or add to them as described earlier.
Per Anool Mahidharia’s best practices article (from 2017), it’s best to keep project libraries in a lib_sch folder under your main project directory, which seems like a good starting point for organization purposes.
Use Your New Symbols
With these new and/or modified symbols in-hand, you can place and use them as you like on your schematic layout. Footprints are assigned by hitting e over a certain component in the Layout Editor, or en masse via the footprint assignment dialog. Pin numbers (or more generally, characters/strings) on the schematic correlate to pad numbers (connections) on the physical footprint layout of components. You’ll want to ensure those are properly aligned in the preceding steps.
With an understanding of custom symbols, you can expand your KiCad abilities from what’s provided “out of the box,” to accommodate any sort of component you need to use!
Jeremy Cook is a freelance tech journalist and engineering consultant with over 10 years of factory automation experience. An avid maker and experimenter, you can follow him on Twitter, or see his electromechanical exploits on the Jeremy Cook YouTube Channel!