Hands-On With the Sparkfun Pro Micro RP2040
September 26, 2022
Blog
The Raspberry Pi RP2040 microcontroller, along with the Pico dev board, and the Pico W (WiFi), have taken the maker world by storm since its original introduction in early 2021. And for good reason, as at $4 for the Pico, $6 for the ‘W, and around a dollar for the chip itself, this 133MHz Arm Cortex-M0+ processor based device is quite an interesting piece of hardware.
The RP2040 can be programmed via Python (MicroPython and CircuitPython), or can be setup for Arduino-C if you so prefer. I’m somewhat partial to the smaller Pro Micro form factor, which is extremely common for keyboard usage. While the Pico isn’t that much bigger (21x51mm vs 33x17.8mm for the Pro Micro), the great news is that the RP2040 is now available in this smaller size, with a compatible pinout, in the form of the Sparkfun Pro Micro RP2040.
First Look At Programming the Pro Micro RP2040

Image Credit: Screencap
To set the RP2040 up for programming via MicroPython, download the latest UF2 file for the Raspberry Pi Pico, and install the Thonny IDE for programming input.
From here, plug in your Pro Micro RP2040 and follow the reset procedure found in SparkFun’s setup guide to transfer the UF2 file there as a removable storage device. The RP2040 will then reboot. Load Thonny, selecting MicroPython (Raspberry Pi Pico) as the interpreter. You may need to select the proper port and/or hit the stop button to allow programming. Type in commands to the read-evaluate-print-loop (REPL) console for a quick response, or code more complicated programs in the area above that can be stored on the Pico.
To save these programs to your Sparkfun Pro Micro RP-2040, hit the disk icon, then select save it to the Raspberry Pi Pico. Name it main.py so that it runs on bootup. Sparkfun’s setup guide has lots more information on the procedure
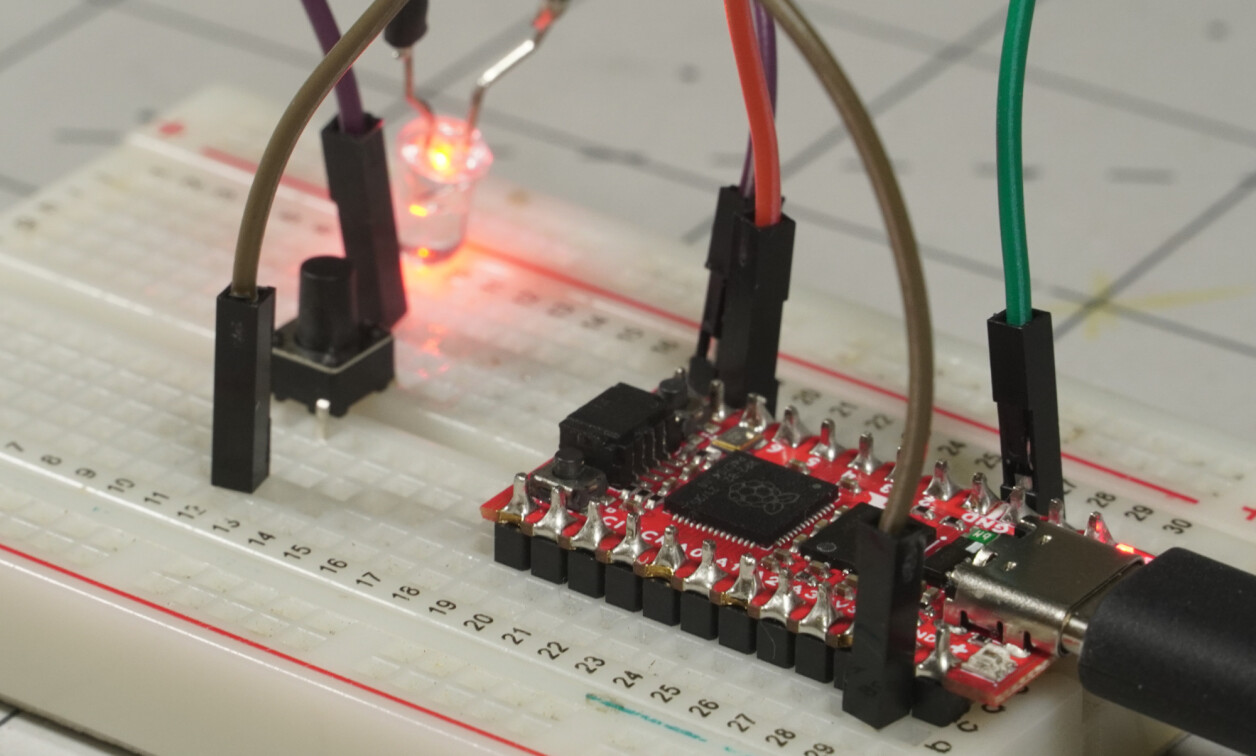
For a quick “blinkie” experiment, hook an LED + appropriate resistor up to pin 8 and ground, and input the following code in the top area. Hit the green run icon to store/activate this code, and the red stop icon to stop its operation.

Image Credit: Screencap
To test it out as an input device, hook up a button between pin 9 and ground (or just make a wire connection), and run the code pictured below. Button presses will be output on your console.

Image Credit: Screencap
Coming from a decidedly Arduino-C programming background, using Thonny/MicroPython is somewhat unfamiliar to me, and will take some adjustment. At the same time, many love Python, so perhaps it’s time to branch out.
Programming Notes: Cables Matter, HID Usage, More Info
I initially had some real frustration with a certain USB-A to USB-C cable, until, per a suggestion, I tried a different cable (USB-C/USB-C). This may not be a problem for you, but it’s something to keep in mind.
For a bit more visual illustration, Don at Novaspirit Tech demonstrates how to make a simple RP2040 HID “auto clicker” in the video below. He’s using a standard Pico, and the CircuitPython language instead of MicroPython. He also elaborates on basic PRP2040 usage in this playlist. The examples above are modified from his standard Pico examples, which could be instructive as to how the two compare.
Pro Micro Pin Compatibility?


Image Credit: Sparkfun Pro Micro (left), Sparkfun Pro Micro 2040 (right)
A Sparkfun Pro Micro R2040 physically fits in the same footprint as a standard Pro Micro. How do the pins stack up?
As seen in the two diagrams above, the function of each board’s pins are largely the same, with different pin numbers. The RP2040 adds on a Qwiic connector with IO and power, boot and reset buttons, as well as a USB-C connector as opposed to a micro-USB. The Pro Micro Runs at 3.3V, the same as some Pro Micros. Bottom line, it shouldn’t let the magic smoke out with a previously 3.3V pro micro setup, though you’ll likely need to adjust the program. However, 5V inputs will likely be problematic, and you’ll want to examine things yourself.
Other Pro Micro Format Options?

Caption: Adafruit KB2040 Kee Boar, Sparkfun Pro Micro 2040, standard RPi Pico.
Image Credit: Jeremy Cook
As it just so happens, SparkFun isn’t the only company that had the idea to put the RP2040 in the well known Pro Micro form factor. Adafruit also has a version called the KB2040, or Kee Boar in reference to its appropriateness for use with custom keyboards. Both are extremely similar, though with a few differences including:
- The SparkFun device features 16 MB of add-on Flash memory, versus the KB2040’s 8 MB.
- Adafruit’s PCB appears to be the standard 1.6mm, while Sparkfun’s is approximately .6mm, potentially helpful if you’ve got an especially weight critical project.
The SparkFun board lists at $10.90, with no advertised bulk discounts, and an order limit, as of this writing, of 100. The Adafruit version is $8.95 for one, and $7.16 for 100 or more. Perhaps not a big deal if you’re making one device, but could be critical if you’re manufacturing hundreds or thousands of copies of a “thing.”
Experimenting with @sparkfun @Raspberry_Pi RP2040 device in Pro Micro form factor: pic.twitter.com/fOikSR4BKk
— Jeremy Cook 🤖 (@JeremySCook) August 4, 2022
While I’m still new to the RP2040, and not particularly experienced with Python, it’s great to have this option available in such a popular form factor. Given my experience with custom input devices, I may have an idea about how to use this in the future!
Jeremy Cook is a freelance tech journalist and engineering consultant with over 10 years of factory automation experience. An avid maker and experimenter, you can follow him on Twitter, or see his electromechanical exploits on the Jeremy Cook YouTube Channel!