Circuit Playground Express: For Education, Pros Too?
April 03, 2024
Blog
The Circuit Playground Express (CPE), as outlined on Adafruit’s product page, is geared toward the educational market and for those who are just getting started with electronics. However, in my opinion, it’s also something that should be considered for more experienced makers and electronics enthusiasts when you want others to replicate your designs.
For example, flashing an ATtiny85 using a programmer, then soldering on a few LEDs for usage X is child’s play for many reading this. To the general public, however, this same operation represents a significant learning curve, and may cause your otherwise excellent project to be pushed aside. The CPE, however, includes an impressive amount of sensing and output hardware onboard (i.e. no soldering) and is (in theory) easily programmable.
Board Features and Stats
Full stats are available on the aforementioned Adafruit product page, but highlights include:
- Processing: ATSAMD21 ARM Cortex M0, 2MB Flash storage
- Sensors: IMU, temperature, light, sound, IR Rx
- Inputs: 2 pushbuttons, 1 slide switch
- GPIO pads: 8 (1 true analog out, 7 capacitive touch capable)
- Outputs: 10 addressable LEDs, miniature speaker, IR Tx
You can program the CPE via four different methods: Code.org, MakeCode, CircuitPython, and Arduino. I tested Arduino and CircuitPython.
Getting to Blinky
.png)
Image Credit: Jeremy Cook
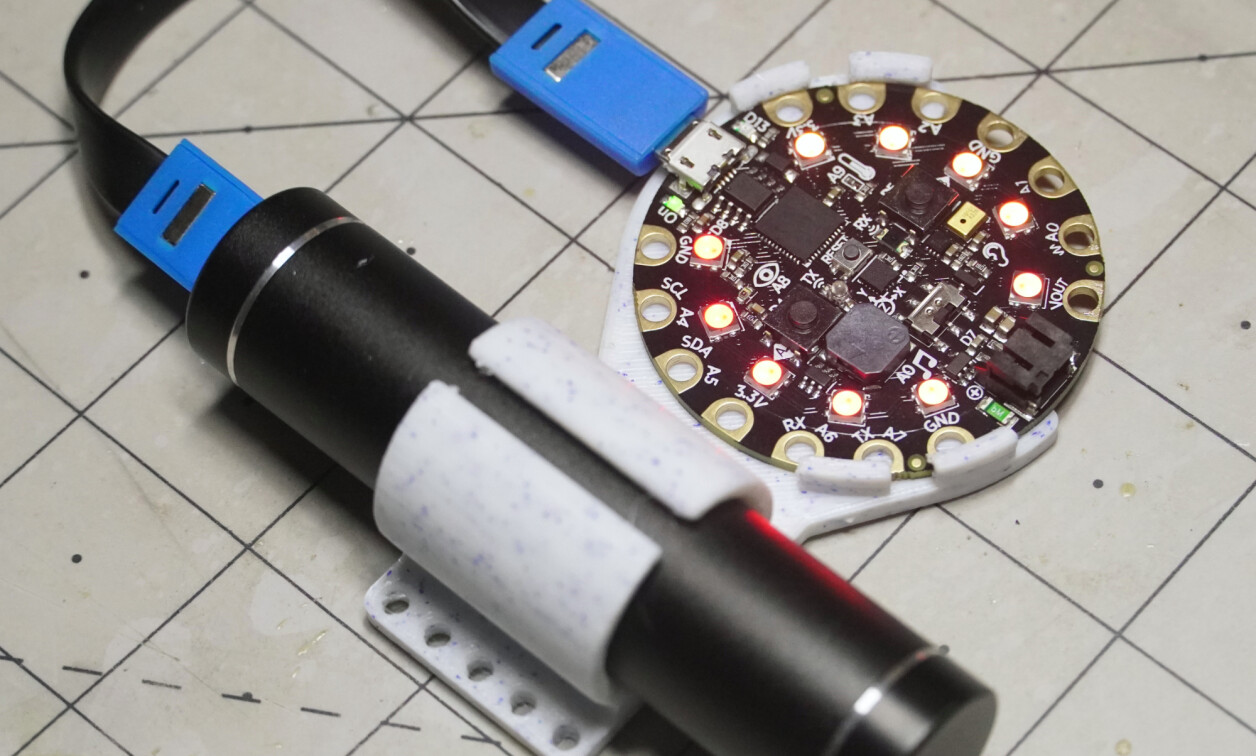
With this round board in hand, getting to blinky, i.e. getting the onboard LED to blink should be easy. One barrier, however, is that the bootloader may need to be updated, especially if you’re using MacOS, as I am. This is largely a drag-and-drop affair, but in the context of developing for less experienced users it could be an obstacle.
With the new bootloader… loaded, programming it via the Arduino IDE was a matter of installing SAMD support and uploading the blink example. Double-click the reset button to put it into programming mode as needed, select your port, and hit the upload button in the Arduino IDE. This also works if you’ve programmed it with CircuitPython and would like to switch to Arduino programming.
To use CircuitPython, double-click the reset button to bring up a CPLAYBOOT drive. Copy the CPE UF2 file found here for CircuitPython and you’re ready to program with MU etc. Note that this doesn’t entirely wipe the memory to a “clean” slate, but there is a “nuke” UF2 available if you want to go that route. This is generally not necessary, and I’ve yet to test this wipe operation.
After some quick tests with Arduino, I have primarily used CircuitPython with it, especially focusing on the VU meter code/project found on this page. I copied the code there and it just worked, displaying sound levels on the 10 onboard addressable LEDs.
Note that with CircuitPython you can, in theory, modify the code.py file (code run by default) in any text editor, which would be great for people who don’t necessarily want to install and/or set up an IDE. However, I’ve found this operation to be less than straightforward on my MacOS system. It’s not necessarily a problem with the CPE itself, but something to keep in mind if your target user is less technical.
Drawbacks, Thoughts, Suggestions?
.jpg)
Image Credit: Jeremy Cook
The CPE’s all-in-one sensor/input/output design gives it massive capabilities. However, at a list price of $24.95, it’s not something that you’d want to integrate into mass-produced devices.
However, the design itself is available on Adafruit’s downloads page. So if you want to use features X and Y on your design, while leaving off Z, Q, and T in your mass-produced thing, you can always make your own minimized board based on it. A 3D model of the board is available, which would be very useful if you want to design accessories to work with it.
Thinking about how I will use this board, mounting holes would be welcome, and (while it would perhaps be a bit of a niche request) a signal breakout for the last addressable LED to extend it into an external strip would be convenient. Castellations/copper on the outside edge of the board could also be useful, as would USB C instead of the Micro USB connector now implemented. Of course, this board is already very capable, but I’ll just put those out there in case a version 2 is in the works.
Bottom Line: Should YOU Try the Circuit Playground Express?
.jpg)
Caption: Your name here / Image Credit: Jeremy Cook
As outlined above, the CPE is billed for educational/classroom use, and in this role it could be an excellent choice. There’s even space on the back where you can write your name–perhaps a result of experience/feedback? The previous version, the Circuit Playground Classic, didn’t have this little nicety.
For the professional/makerpro audience, I see two major roles for this board. First, if you need to try out the devices here and use Adafruit’s setup as a reference design, its $24.95 price tag could be a very good value. Second, if you want to make a kit or even an instructional video/writeup for others to duplicate–while taking advantage of rather advanced hardware features–few boards pack as much into one package as the Circuit Playground Express.
While it won’t fit the needs of every project, if it matches up with yours the Circuit Playground Express could be a very good choice. For another sensor-integrated board in a smaller package, also check out the XIAO nRF52840 Sense featured here. Finally, for more info on taking your Arduino project to the next level, check out my Developing With Arduino series, taking place monthly throughout the year (2024).