Reserve Static IP Addresses on Your Router
February 09, 2021
Blog
In a previous article, I outlined how to connect to your Raspberry Pi via SSH, and noted how you can assign a Static IP address to allow you to consistently find it.
In another post I talked about how to flash devices with Tasmota for cloud-free home automation. You can then use a program called Angry IP scanner to identify its location. It’s apparently possible to assign an IP address for these devices as well, though it has some potential drawbacks depending on your router.
This would be fine if you have one or two “things” on your network, but figuring out the details of assigning an IP address for each and every one of your connected devices can be cumbersome to say the least. Plus, it can reportedly cause issues in some situations. An arguably better solution is to assign, or reserve, IP addresses through your router.
Such a setup takes care of potential conflicts, and gives you a unified interface from which to make changes. Your router and configuration may be different than what’s outlined here, but the concepts should be widely applicable.
Find Your Router, Log On
First you’ll need the IP address of your router. One place to start is by physically looking at the actual router, which on the back of mine says “http://192.168.1.1.” It also gives the router login username as “admin,” and the password as, you guessed it, “admin.” It also shows my WiFi password, which, for obvious reasons, I will keep to myself. While many router addresses will start with 192.168, as outlined here, there are a wide range of defaults. So if it’s not printed on the machine, taking a guess isn’t generally the best technique.
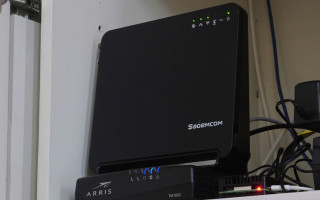
Another way to find the router’s IP address is to enter ipconfig in the Windows command prompt, and look for the default gateway. On a Mac terminal you can use netstat -nr | grep default. Finally, if you’d like an overall picture of your network, fire up Angry IP Scanner (or whatever scanner you prefer), and you should be able to pick out the router. Mine comes up as “SAGEMCOM.”
With this address in-hand, navigate there via your browser, where you should find a login screen in which your credentials can be entered. Hopefully you were able to find this printed on the router itself, but if not, a bit of web searching may yield the answer, as it seems the default passwords are generally pretty boring. Note that what follows is based on my router, so your experience may be somewhat different.
Changes

(Image Credit: screencap)
Once logged on, you’ll be presented with a variety of options. For my particular device, there’s a listing for wired Ethernet, as well as 2.4 and 5.0GHz WiFi. While not as fast, 2.4GHz signals tend to travel further, and are compatible with more devices, so this “spectrum duality” can be advantageous if you know how to set things up.
For each connection type, there’s a listing of actual devices, such as “Jeremys-MBP” under Ethernet for my MacBook Pro, a plethora of tasmota listings under WiFi 2.4GHz, and what appears to be my phone under WiFi 5.0GHz. If you click on one of these devices you’re taken into an info screen, where there are interesting specs including signal strength and the manufacturer, as well as the IP address with a “Reserve IP” button beside it (or “Cancel reservation” if you’ve already set one up). Click this button to hold the reservation, which keeps the IP address in one place where you can find it.

(Image Credit: screencap)
Besides the info screen, there are several other device tabs, including a “parental control” where you can cut off different devices at certain times. If whoever you’re restricting is especially clever, you might need to also change login credentials, which are available under the Access Control > User menu from the home screen.
More?
While accessing your router is a great way to keep track of your devices address-wise, it’s worth poking around to see what else you can do. I was surprised to find a media tab under router settings, which allows you to attach a drive for file sharing. There’s also a LED Control tab available to turn the activity lights off. Certainly a better option than the “traditional” masking tape method.
So if you need a centralized way to keep your IP addresses organized, be sure to check out your router’s controls. It’s a lot easier than accessing a large number of devices separately, and you may find a few settings that are helpful for a variety of other reasons!