Hands-On With the Wemos S2 Mini ESP32 Development Board
August 01, 2022
Blog
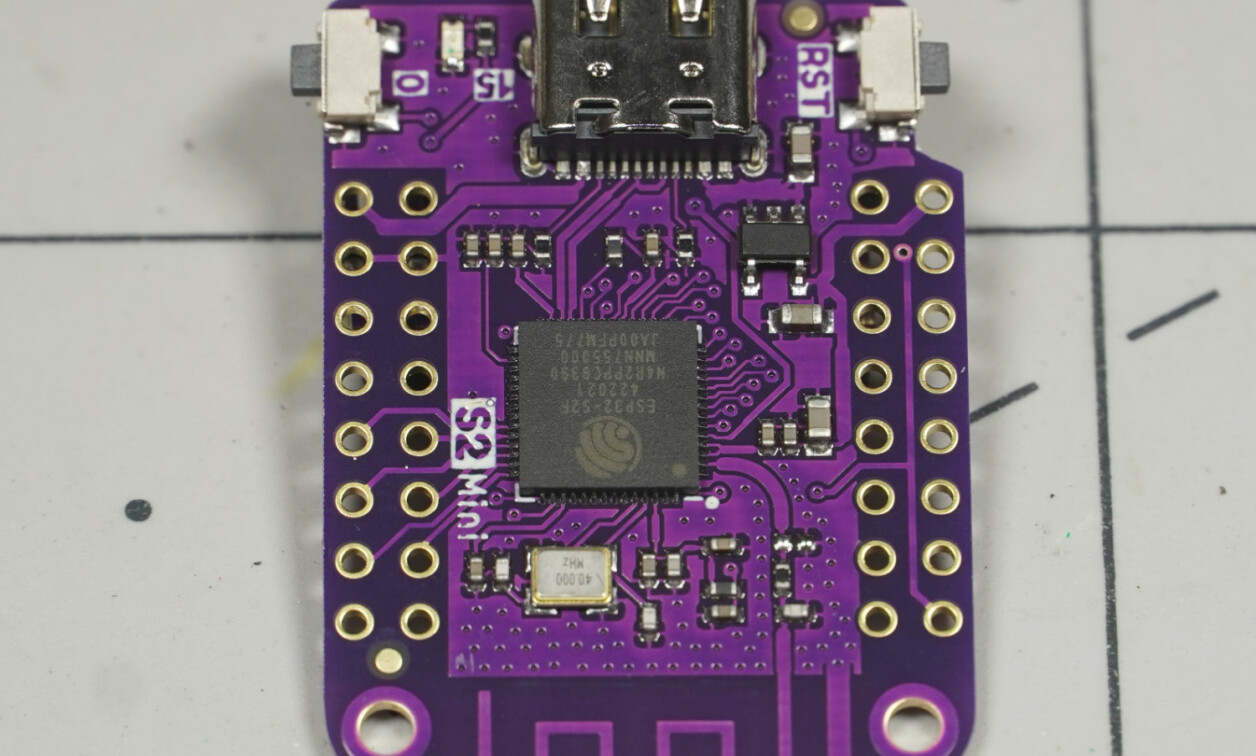
If you’re looking for a great way to get started with the ESP32, the Wemos/LOLIN S2 mini is an excellent option. It comes in a form factor compatible with the ESP8266-based Wemos/LOLIN D1 mini, and the S2 mini can thus work with D2 mini shields. Ground, Vbus, and 3V3 pins are in the same place, though the IO pin numbering is different, so any swaps would certainly require a bit of reprogramming for proper functionality.
The S2 mini features two rows of header connections to the inside of the D1 mini-compatible pins in order to accommodate its expanded 27 broken out IO. This expanded IO could be very convenient in some situations, though its double-row header setup could also be difficult for breadboard usage. In my experimentation–I’m working on a device that could potentially be used with either the S2 mini or D1 mini–I only populated the outer headers, and this worked out well for my purposes.
Beyond the pin arrangement, the device has a USB-C input, which is much appreciated. It also has a reset button, as well as an interface button, needed to put it in programming mode. Info on the device is found here, including a schematic and getting started guides with MicroPython and Arduino.
Getting Started With Arduino

Image Credit: Screencap
With the S2 mini in-hand, you’ll likely want to make sure you can blink its onboard LED. If you haven’t previously, first add support for ESP32 modules through the board manager. Input https://raw.githubusercontent.com/espressif/arduino-esp32/gh-pages/package_esp32_dev_index.json under Arduino > Preferences in the Additional Board Manager URLs field. Then go to Tools > Board > Boards Manager and search for esp32. Install the option by Espressif Systems. Once updated, select LOLIN S2 MINI under Board/ESP32 Arduino.
Load up the standard blink sketch into the Ardiuno IDE, and plug in the LOLIN S2 mini board via USB-C, and select the appropriate port. Press the upload button on the Arduino IDE, then hit reset, and the interface button on the S2 mini. Quickly release the reset button, then the 0 interface button to put it into programming mode, and if all is well, the blink program will be loaded onto the S2 mini. An “error” message may be displayed, which is simply telling you to hit the reset button to put the device into run mode. Reset, and the onboard LED should blink away.
This took me a bit of fiddling to get the load procedure down, but hopefully that shortcuts things for you. If you don’t see the proper port initially, try running the reset/interface button procedure before opening Tools > Port.
I/O Pin Arrangement

Caption: Jeremy Cook
Image Credit: Screencap
The device’s pinout/schematic is found here, or near the bottom of the linked Wemos info page. For purposes of working with the Arduino IDE, what you see printed on the board, and the GPIO/IO numbering corresponds to the Arduino pin numbering. That is, if you input digitalWrite(17, HIGH); the pin marked as such will go high on the S2 mini.
This may seem obvious, but sometimes pin numbering on such boards is not this straightforward, so don’t overthink it!
Web Server? Touch Capabilities? Yes!

Image Credit: Screenshot from ESP32-S2 datasheet
As a quick test, I created a web server based on this tutorial. This was quite straightforward and worked without issue. I was able to modify it to work with addressable LEDs using the NeoPixel library. I also tested out the touch capabilities based on the first part of this tutorial. This worked with no additional hardware, though the pinout is different, so you’ll want to make sure you reference the datasheet in the section 2.2 Pin Description.
Bottom Line:

Image Credit: Jeremy Cook
For prototyping, and hobby applications where you’d like all the components needed to support an ESP32-S2 in a convenient package, the S2 mini appears to be a good option. Having the ability to try out an ESP32, as well as an ESP8266, without swapping any pins around is really great for prototyping, even if you may eventually go with something like a WROOM module, if and when a device goes into production. In our era of questionable part availability, this type of flexibility is perhaps more important than ever before!